Designing, Building, and Mounting Bathroom Shelving
The problem with living in a small single person apartment in the lack of space. This is especially true in my bathroom. There is a very small medicine cabinet above the sink, but the sink itself has no surfaces to place anything and does not have a cabinet underneath. I have no place to put things like toothbrushes, toothpaste, floss, etc. and my medicine cabinet was already full with other things. Additionally, when I have guests, they have no place to put anything either. My solution was to design, build, and mount a new shelf to hold all of these toiletries.
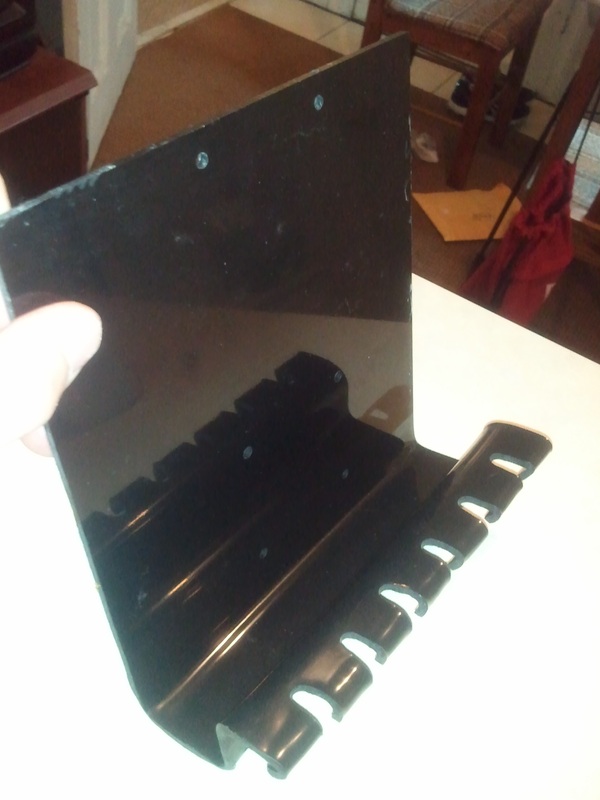
Step 1: I started by sketching a few ideas and general dimensions by measuring width and length of the average toothbrush and toothpastes. I then took similar plexiglass that was used in several of my other projects (Fish tank lid, Micromouse) and cut the first piece with a dremel. I heated the plastic up with a heat gun and bent it 3 times in 90 degree angles. I then took a dremel bit and dremeled holes into the plastic to make each groove to hold the toothbrushes and other items. I then heated each flange and bent it down to add a cool effect.
Step 1: I started by sketching a few ideas and general dimensions by measuring width and length of the average toothbrush and toothpastes. I then took similar plexiglass that was used in several of my other projects (Fish tank lid, Micromouse) and cut the first piece with a dremel. I heated the plastic up with a heat gun and bent it 3 times in 90 degree angles. I then took a dremel bit and dremeled holes into the plastic to make each groove to hold the toothbrushes and other items. I then heated each flange and bent it down to add a cool effect.
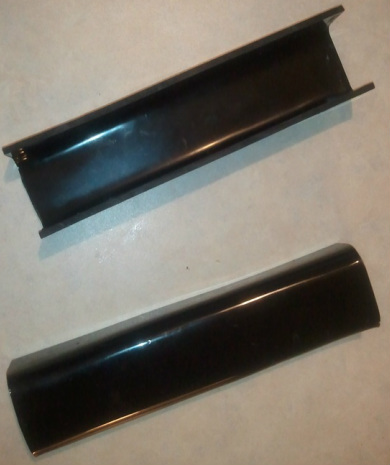
Step 2: From here I made 2 additional shelf pieces using the same method.
Step 3: I drilled holes in the top for mounting the shelf to the wall and two sets of holes equally spaced apart to attach the two shelf pieces. I attached each piece with small plastic bolts and nuts.

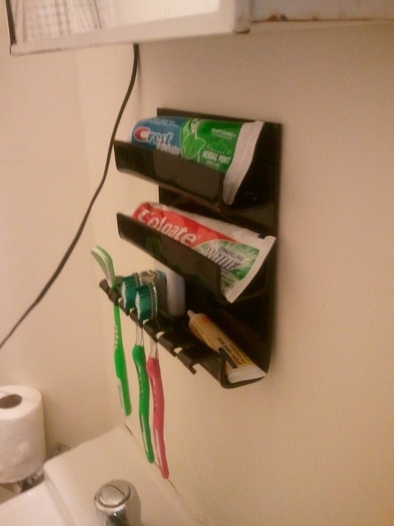
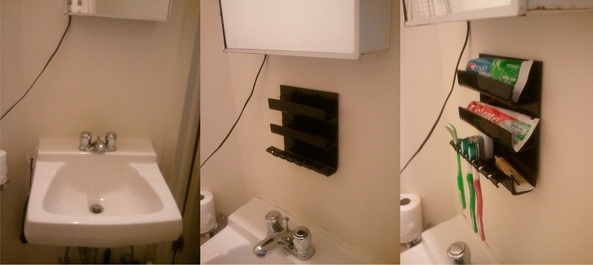
Step 4: The final step was to mount the shelf to the wall and see how it works.

Final Result:
It worked perfectly as planned.