Eagle Scout Project
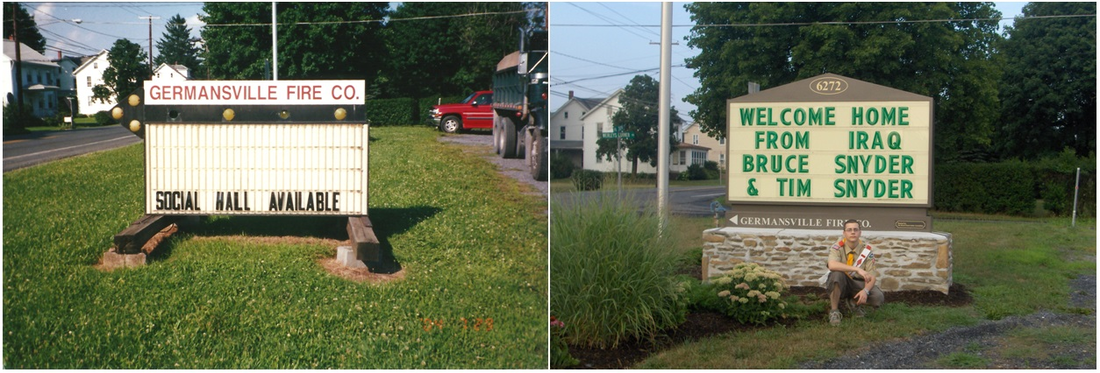
I received my Eagle Scout when I was 15. It was a fantastic experience and it was a great way to help my community. We came across the project when we went to a town hall meeting at the municipal building down the street from my house. We asked if they had any projects, and they had mentioned how they wanted to construct a permanent sign to replace the old one that they were using from our local fire department.
The project required a lot of masonry work which was great because my dad went to school for masonry and you can never learn too many skills. They had already picked the sign out, so my project was to build the base of the sign. They in formed us of the desired location and brought in a backhoe to dig the hole for us. They also had someone pour the base slab of concrete.
|
|
|
|
The next step was to start laying the foundation. We had to shorten the blocks a bit by tapping a grove into the block with a chisel and then breaking it off with a hammer. We also ran the electric up through the center so the sign's internal lights could be powered. You will notice that in the last picture that are metal tabs hanging out from the sides. These will be used later to hold the stone outside to the block foundation.
|
|
|
|
Next, we laid blocks around the outside of the foundation to create a sill to lay our stone facing later. We then filled the holes with rocks so it wouldn't require as much concrete to fill in the blocks. In the final picture you can see the frame that was given to us that needed to be mounted inside the foundation in order to hold the sign.
|
|
|
|
Now that the foundation was laid, we could fill it in with cement and secure the frame that the sign would be bolted to. Once it dired, we could remove the wood that held the frame in place.
|
|
|
|
Time to put the nice stone facing onto the sign base! We went to a local farmers house where he had a large amount of rocks in his woods. We loaded up a bunch in our trailer and dumped them off. I start by going through the rocks to find the best ones for facing the base. Our goal was to make it look nice and unique. This part takes time because you must find rocks the work well together, you have to make sure you also keep the faces clean of cement, and you can only go so many layers high before you have to stop and wait a day or two for it to dry. You can see from the picture that we did this over multiple days because the first layer had to dry before we could continue to stack more rocks on top of it.
|
|
|
|
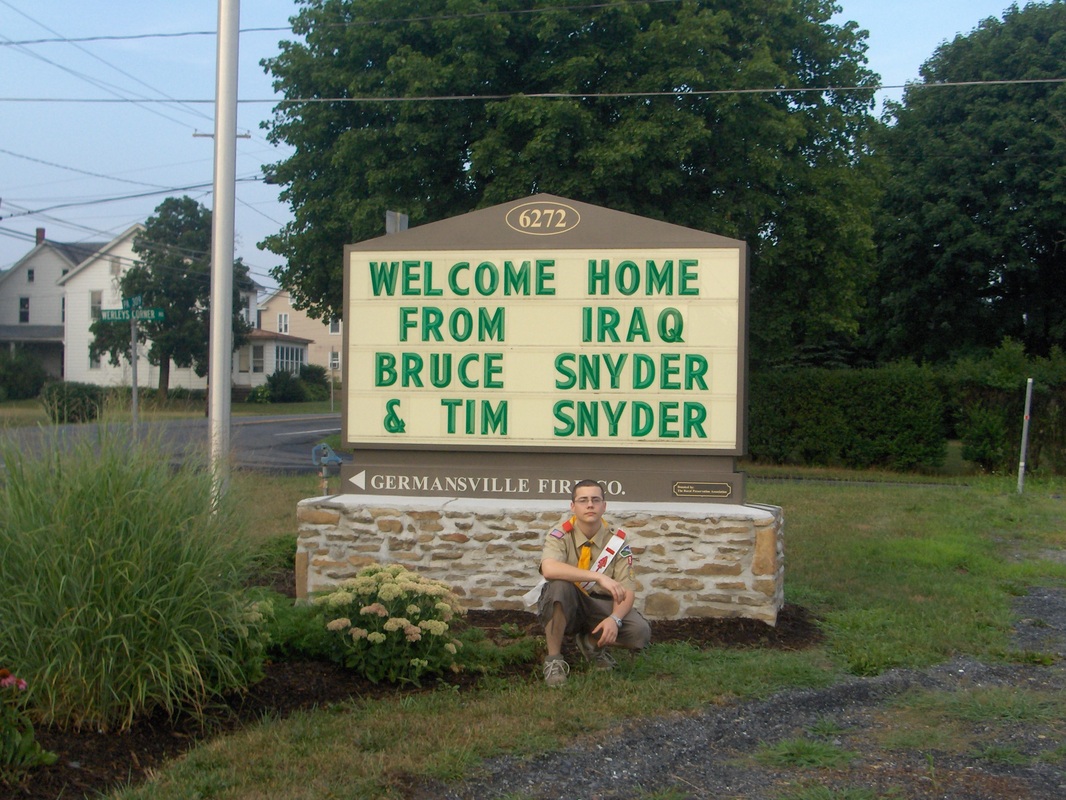
Once the base was good and dry, the sign company came and mounted the sign and ran the electric. Unfortunately we were not done yet. We had to put the finishing touches on the base buy putting a nice sloped top on the edges of the base.
|
|
|
|
We are done! I snapped a picture of my in front of it with my uniform on before my ceremony.